
One of the easiest ways to improve distance is to incorporate your legs into your shot. This week in the blog I’m going to start you on your journey to the X-step. You’ll develop your own X-Step tendencies, but this is a great way for folks to get their feet wet.
Once you’ve gotten this X-Step down you’ll be able to increase distance and improve your control as well.
First things first. I want to make sure you’re in the right mental space for practicing the X-Step. Follow these couple of rules and you’ll be well on your way to getting it down.
1. Embrace the suck.
You’re not going to get this the first try. There’s a chance you may fall off the teepad. And you will absolutely yeet one of your discs sideways with your messed up timing.
But don’t just take my word for it, here’s some sage advice for you.
2. Don’t just throw.
I know how tempting it is to go to what you’re good at. My forehand practice suffered because I would get mad at those wobbly little things coming out of my hand and go to backhand to feel good about myself.
There’s 6 steps to the X step. Take them slowly and build from the first step all the way to the last, and I promise you’ll see results in a few hours.
Step 1
Face the Basket. Get those feet about shoulder width apart. Maybe roll your shoulders and tilt that neck from side to side to get loose when you’re on the teepad.

I like to start on the back left of the teepad and move to the right side when I’m on Hole 4 of our Hawk course. If you’ve got any questions about teepads you can check out my blog here.
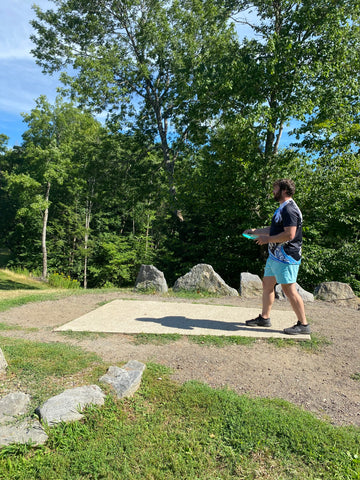
Step forward with the dominant arm foot. I’m a righty, so I step forward with my right foot. It’s important to be on the balls of your feet here with both your lead and back foot.
Spin sideways on your feet so that you’re now facing 90 degrees away from the basket. This is a little bit tricky to develop. But once you are confident in your X-Step you’ll be combining the forward step with the sliding of your body and feet. Here’s Paul McBeth at the 2022 DGLO doing an excellent display of his feet. See how he faces the basket, then he spins to the side.

Now it’s time to take your back foot and put it behind your lead foot. This movement is the most important part of the X step, and gives the move its name. It’s also hard to balance here for a picture.

Disco move! Moving your lead foot and your throwing hand in opposite directions at the same time is important. I call it the disco step because that's what it looks like to me. Practice this move over and over. You’re lengthening your body like an uncoiled spring and bringing that potential energy to its peak.

Step 6
This is the act of throwing the disc. Make sure that back leg (left for me) has come in front of your body and you’ve landed on it. I also like to have my left arm point towards the basket. Your X-Step is going to be putting a lot of torque on your body, don’t slow up and have all that force collect in your knees, hips, and shoulders. Here’s a blog I wrote about follow through and why it’s important for you.

If you need/want to see the X-Step in motion here’s a video of me from the side explaining it and showing my drive.
Here’s another video from the back where you can see me throwing as well.
The X-Step is a great way to add power to your drives. You do lose a little consistency at first, you’re going to launch some high into the sky and others will be griplocked off the fairway. But you’ve seen what the X-Step can do for the best players in the world. And you can do it too with a little bit of practice.
Give yourself 15-30 minutes to try it out. Then go on with your round and enjoy yourself. Keep coming back until you’ve got it down. As always leave a comment on the blog or the Facebook and I’ll be glad to get back to you!
May your discs miss all the trees,
Andrew Streeter #70397